-
Table of Contents
Understanding the Whirlpool Dryer Parts Diagram
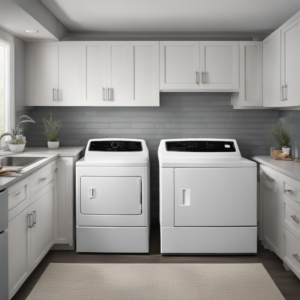
Whirlpool dryers are a popular choice among American households due to their efficency, durability, and user-friedly features. However, like any other appliance, they may require occasional maintenance or replacement of parts. This article will guide you through the whirlpool dryer parts diagram, helping you understand the various components and their functions. We will also discuss common troubleshooting examples and solutions.
Decoding the Whirlpool Dryer Parts Diagram
The whirlpool dryer parts diagram is a detailed schematic that illustrates the various components of your dryer. It incldes parts such as the door latch, thermal fuse, drum, motor, and more. understanding this diagram can help you troubleshoot issues and identify the parts you may need to replace.
Whirlpool Duet Dryer Parts Diagram
The Whirlpool Duet series is a line of high-efficiency dryers with advanced features. the parts diagram for these models includes components like the control panel, heating element, drum, and door seal. The diagram also shows the location of the thermal fuse, which is a safety device that shuts off the dryer if it overheats.
Whirlpool Cabrio Dryer Parts Diagram
The Cabrio series is another popular line of Whirlpool dryers. The parts diagram for these models includes the drum, motor, blower wheel, and thermal cut-off kit. the diagram also shows the location of the door latch, which is a crucial component that keeps the dryer door securely closed during operation.
Replacement Parts for Whirlpool Dryer
When it comes to replacing parts on your Whirlpool dryer, it’s essential to use genuine Whirlpool parts to ensure the best performance and longevity of your appliance. Some of the most commonly replaced parts include:
- Thermal Fuse: This safety device prevents the dryer from overheating. If your dryer is not heating at all, the thermal fuse may need to be replaced.
- Door Latch: This part keeps the dryer door securely closed during operation. If the door won’t stay shut, you may need to replace the door latch.
- Drum Belt: This part rotates the drum. If your dryer is making a loud noise or won’t tumble, you may need to replace the drum belt.
When to Call the Authorized Service
While some minor issues can be fixed by replacing parts, more complex problems may require professional assistance. If your dryer is not working despite replacing the necessary parts, or if you are unsure about the issue, it’s best to call the authorized service. whirlpool has service centers in many provinces across America. You can find the nearest service center by calling the call center specified on the company’s official website.
Conclusion
Understanding the whirlpool dryer parts diagram can help you troubleshoot issues and identify the parts you may need to replace. However, for complex issues, it’s best to seek professional help. Remember, using genuine Whirlpool parts can ensure the best performance and longevity of your appliance.
Note: The information provided in this article is collected from the internet and may contain inaccuracies. For the most accurate and up-to-date information, please visit the official Whirlpool website. The site owner is not responsible for any inaccuracies or issues arising from the application of the information provided.



Youtube video updated.