-
Table of Contents
How To Take Apart A GE Dryer
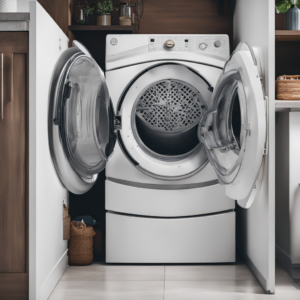
GE dryers are known for their durability and efficiency, but like any other appliance, they may require maintenance or repairs over time. Taking apart a GE dryer can be a daunting task, especially if you have nevr done it before. However, with the right tools and knowledge, you can successfully disassemble your GE dryer for troubleshooting or repair purposes. In this article, we will guide you through the process of taking apart a GE dryer step by step.
1. Safety First
Before you start disassembling your GE dryer, it is crucial to prioritize safety. Make sure to unplug the dryer from the power source to avoid any electrical accidents. Additionally, wear protective gloves and safety goggles to protect yourself from sharp edges and debris.
2. Gather the Necessary Tools
Having the right tools will make the disassmbly process much easier. Here are the tools you will need:
- Phillips screwdriver
- Flathead screwdriver
- Socket wrench
- Pliers
- Putty knife
3. Remove the Control Panel
The control panel is usually located at the top of the dryer. To remove it, follow these steps:
- Use a putty knife to release the spring clips that hold the control panel in place.
- Gently lift the control panel and disconnect any wires attached to it.
- Set the control panel aside.
4. Take Off the Dryer Top
Once the control panel is removed, you can proceed to take off the dryer top:
- Locate the screws that secure the top panel to the dryer cabinet.
- Use a screwdriver or socket wrench to remove these screws.
- Lift the top panel and prop it against a wall or support.
5. Remove the Front Panel
The front panel of the GE dryer houes the door and the drum. To remove it, follow these steps:
- Disconnect the wires that connect the door switch to the dryer.
- Locate the screws that secure the front panel to the dryer cabinet.
- Use a screwdriver or socket wrench to remove these screws.
- Gently pull the front panel away from the dryer cabinet.
6. Access the Drum and Other Components
With the front panel removed, you can now access the drum and other compoents of the GE dryer. this will allow you to troubleshoot and repair any issues you may be experiencing, such as a dryer not drying properly.
Replacement Parts for GE Dryers
If you have identified a faulty component in your GE dryer and need to replace it, there are several options available. you can purchase genuine GE replacement parts from authorized dealers or directly from the GE website. Alternatively, you can explore third-party suppliers that offer compatible parts for GE dryers. Some common replacement parts for GE dryers include:
- Heating elements
- Thermostats
- Belts
- Drum bearings
- Door switches
It is important to note that if you are not confident in your ability to replace the parts yourself, it is recommended to call an authorized service center. They have the expertise and experience to handle the repair safely and effectively.
Conclusion
Taking apart a GE dryer may seem intimidating at first, but with the right tools and knowledge, it can be a manageable task. by following the step-by-step guide provided in this article, you can safely disassemble your GE dryer for troubleshooting or repair purposes. Remember to prioritize safety, gather the necessary tools, and consult the appropriate resources for replacement parts or professional assistance. with proper maintenance and care, your GE dryer will continue to provide efficient and reliable performance for years to come.
Note: The information written here is collected from the Internet. There is a possibility that it may contain incorrect information, so for the most accurate and up-to-date information, the official website of the company should be visited. Any responsibility arising from wrong information or application does not belong to the site owner.

